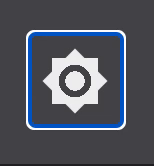
Dark mode is all the rage these days, so it's almost expected that every site has a dark mode option. Shopping around for inspiration and different implementations of a toggle, I decided to just make my own since the kind of icons I found weren't quite what I was looking for.
This dark mode toggle is pure CSS for all of the styling and JavaScript for the event listener to switch between the sun and moon icons. Since my website is built with React and Theme UI, I used the event listener to change the color mode for my theme to update the colors throughout the site!
CodePen link
HTML
<buttonclass="container"aria-label="Toggle color mode"title="Toggle color mode"><div class="sun visible"></div><div class="moon"><div class="star"></div><div class="star small"></div></div></button>
For accessibility purposes, I put the entire icon inside of a button tag. In my React site, I created a label variable whose value changes depending on what colorMode the site's theme is currently in. I then passed this label to the aria-label and title attributes on the button for increased accessibility. That way the aria-label and title are dynamic, saying "Activate light mode" or "Activate dark mode" depending on what the current colorMode is. To make the Pen more generic for JavaScript users, I have simplified them here.
Inside of the button tag, there are 2 children divs: the sun and moon. I chose to display the sun icon by default by adding the visible class, but you can have the moon show first if you'd like. And inside of the moon, there are 2 children divs for the little stars.
CSS
1.container {2 width: 46px;3 height: 46px;4 box-sizing: border-box;5 padding: 12px;6 background: none;7 border: none;8 display: flex;9 justify-content: center;10 align-items: center;11 position: relative;12}1314.sun {15 width: 50%;16 height: 50%;17 position: absolute;18 pointer-events: none;19 opacity: 0;20 transform: scale(0.6) rotate(0deg);21 transition: transform 0.3s ease-in, opacity 0.2s ease-in 0.1s;2223 /* white transparent for Safari */24 background: radial-gradient(25 circle,26 rgba(0, 0, 0, 0),27 rgba(0, 0, 0, 0) 50%,28 #f0f0f0 50%29 );30}3132.sun:before {33 content: "";34 position: absolute;35 display: block;36 width: 100%;37 height: 100%;38 background: radial-gradient(39 circle,40 #f0f0f0 30%,41 rgba(0, 0, 0, 0) 31%,42 rgba(0, 0, 0, 0) 50%,43 #f0f0f0 50%44 );45 transform: rotate(45deg);46}4748.sun.visible {49 pointer-events: auto;50 opacity: 1;51 transform: scale(1) rotate(180deg);52 transition: transform 0.3s ease-in, opacity 0.2s ease-in 0.1s;53}5455.moon {56 width: 50%;57 height: 50%;58 pointer-events: none;59 position: absolute;60 left: 12.5%;61 top: 18.75%;62 background-color: rgba(0, 0, 0, 0);63 border-radius: 50%;64 box-shadow: 9px 3px 0px 0px #f0f0f0;65 opacity: 0;66 transform: scale(0.3) rotate(65deg);67 transition: transform 0.3s ease-in, opacity 0.2s ease-in 0.1s;68}6970.moon.visible {71 pointer-events: auto;72 opacity: 1;73 transform: scale(1) rotate(0deg);74 transition: transform 0.3s ease-in, opacity 0.2s ease-in 0.1s;75}7677.star {78 position: absolute;79 top: 25%;80 left: 5%;81 display: block;82 width: 0px;83 height: 0px;84 border-right: 7px solid rgba(0, 0, 0, 0);85 border-bottom: 5px solid #f0f0f0;86 border-left: 7px solid rgba(0, 0, 0, 0);87 transform: scale(0.55) rotate(35deg);88 opacity: 0;89 transition: all 0.2s ease-in 0.4s;90}9192.star:before {93 border-bottom: 5px solid #f0f0f0;94 border-left: 3px solid rgba(0, 0, 0, 0);95 border-right: 3px solid rgba(0, 0, 0, 0);96 position: absolute;97 height: 0;98 width: 0;99 top: -3px;100 left: -5px;101 display: block;102 content: "";103 transform: rotate(-35deg);104}105106.star:after {107 position: absolute;108 display: block;109 color: red;110 top: 0px;111 left: -7px;112 width: 0px;113 height: 0px;114 border-right: 7px solid rgba(0, 0, 0, 0);115 border-bottom: 5px solid #f0f0f0;116 border-left: 7px solid rgba(0, 0, 0, 0);117 transform: rotate(-70deg);118 content: "";119}120121.moon.visible .star {122 opacity: 0.8;123}124125.star.small {126 transform: scale(0.35) rotate(35deg);127 position: relative;128 top: 50%;129 left: 37.5%;130 opacity: 0;131 transition: all 0.2s ease-in 0.45s;132}133134.moon.visible .star.small {135 opacity: 0.7;136 transform: scale(0.45) rotate(35deg);137}
Let's break this down into smaller chunks so it's easier to digest.
Button
First, we give our button container some styling. I made the button 46px tall since industry guidelines recommend that interactive elements, like buttons, should be between 44px-48px tall. However, I didn't want the actual icons to be quite so big, so I added some padding. That way the icons can be smaller, but the "touchable" interactive footprint is still within the accesibility guidelines. Then all that's left is some flexbox magic to center everything!
.container {width: 46px;height: 46px;box-sizing: border-box;padding: 12px;background: none;border: none;display: flex;justify-content: center;align-items: center;position: relative;}
Sun
.sun {width: 50%;height: 50%;position: absolute;pointer-events: none;opacity: 0;transform: scale(0.6) rotate(0deg);transition: transform 0.3s ease-in, opacity 0.2s ease-in 0.1s;background: radial-gradient(circle, rgba(0, 0, 0, 0) 50%, #f0f0f0 50%);}.sun:before {content: "";position: absolute;display: block;width: 100%;height: 100%;background: radial-gradient(circle,#f0f0f0 30%,rgba(0, 0, 0, 0) 31%,rgba(0, 0, 0, 0) 50%,#f0f0f0 51%);transform: rotate(45deg);}.sun.visible {pointer-events: auto;opacity: 1;transform: scale(1) rotate(180deg);transition: transform 0.3s ease-in, opacity 0.2s ease-in 0.1s;}
The sun is the easiest of the 3 shapes. All we have to do is create 2 squares, lay them on top of each other, and rotate one of them. Boom, we have a 6-point star shape. Let's break down what that looks like:
- Since our button dimensions are square, we can just set the
heightandwidthto each be 50% of the containing button. To create 2 squares, we can utilize thebeforepseudo-element on oursundiv. Don't forget to give itcontent: ""! - To lay the squares on top of each other, we can use
position: absolute. Just make sure to give the buttonposition: relativeso that our squares position themselves within the button. - Pick which square you want to rotate. In this case, I chose to rotate the
beforepseudo-element. Addtransform: rotate(45deg)
A note on the
beforepseudo-element: Its height and width are relative to its parent container, which in this case is oursundiv. To make our squares the same size, we want thebeforeelement to have a height and width of100%.
Ok, cool, we have a 6-point star. But how do we add the circle in the middle? We could just add more divs to create some circles, but then we would have to worry about making sure the color of the larger circle always matches whatever the background color behind the sun icon.
Enter radial gradients! As our background property value, we can create a circle that starts out as the color of our sun icon (in this case, #f0f0f0), has a hard color stop to change to a transparent color, and then a final color stop to change back to our sun icon color. Here's what our radial gradient looks like:
background: radial-gradient(circle,#f0f0f0 30%,rgba(0, 0, 0, 0) 31%,rgba(0, 0, 0, 0) 50%,#f0f0f0 51%);
Since we are using the default radial gradient positioning, the circle will start in the middle of our div. The colors will start at the center and move outwards. Here, we are starting with a color of #f0f0f0 for the first 30% of our div. Then at 31%, we change to a transparent color and stay at this color until we hit 50%. This way, we will be able to "see through" the sun icon for 19% of the size of the div. Finally, at 51%, we change back to our #f0f0f0 color for the remainder of the div. Play with the percentages to get the circles to be the sizes you want.
I went with a "hard coded" color with an alpha value of 0 because the transparency color of the
transparentvalue appears as a black transparent in Safari, as opposed to a more white transparency in other browsers. To circumvent this, I opt for picking a color and reducing the alpha value.I also chose to offset the color stops by 1% so that the change from one color to the next is not quite so harsh on the eyes. You can certainly have the stops start and stop at the same values, if you prefer that.
You can use this background value for both squares or just one. If you do it for just one, the second square just needs to have a transparent radial gradient that has a color stop to change back to the sun icon color at the same point as our first square (in this case, 51%). It doesn't matter either way. Doing it this way just means that only one of the squares has the colored inner circle.
background: radial-gradient(circle, rgba(0, 0, 0, 0) 50%, #f0f0f0 50%);
Ta-da! We have a sun icon!
Moon
.moon {width: 50%;height: 50%;pointer-events: none;position: absolute;left: 12.5%;top: 18.75%;background-color: rgba(0, 0, 0, 0);border-radius: 50%;box-shadow: 9px 3px 0px 0px #f0f0f0;opacity: 0;transform: scale(0.3) rotate(65deg);transition: transform 0.3s ease-in, opacity 0.2s ease-in 0.1s;}.moon.visible {pointer-events: auto;opacity: 1;transform: scale(1) rotate(0deg);transition: transform 0.3s ease-in, opacity 0.2s ease-in 0.1s;}
For our moon, we're going to take advantage of the box-shadow property to get that crescent shape. You can read more about box shadows here
- To start, we give our moon div a transparent background color because the part we actually want to see is that
box-shadow. - We want a round moon, so we'll give our div a
border-radiusof 50%. - Then, we'll add a
box-shadow. In this case, we used a value of9px 3px 0px 0px #f0f0f0. You can play with these values to get the size and shape you want.
The values of the
box-shadowproperty break down to this:offset-x | offset-y | blur-radius | spread-radius | color
I also gave the moon an absolute position and changed the left and top values to position the moon icon where I wanted it inside of the button. Feel free to change them!
Stars
.star {position: absolute;top: 25%;left: 5%;display: block;width: 0px;height: 0px;border-right: 7px solid rgba(0, 0, 0, 0);border-bottom: 5px solid #f0f0f0;border-left: 7px solid rgba(0, 0, 0, 0);transform: scale(0.55) rotate(35deg);opacity: 0;transition: all 0.2s ease-in 0.4s;}.star:before {border-bottom: 5px solid #f0f0f0;border-left: 3px solid rgba(0, 0, 0, 0);border-right: 3px solid rgba(0, 0, 0, 0);position: absolute;height: 0;width: 0;top: -3px;left: -5px;display: block;content: "";transform: rotate(-35deg);}.star:after {position: absolute;display: block;color: red;top: 0px;left: -7px;width: 0px;height: 0px;border-right: 7px solid rgba(0, 0, 0, 0);border-bottom: 5px solid #f0f0f0;border-left: 7px solid rgba(0, 0, 0, 0);transform: rotate(-70deg);content: "";}
The stars were the most challenging part for me. If you look closely, they're far from perfect. But since they're so small, I didn't stress trying to make them pixel perfect. The trick used here was creating 3 triangles and rotating and overlapping them to create a star-like shape. Pretty sneaky, huh?
To make a triangle with CSS, we're actually going to use the border property. By giving the div a width and height of 0, the borders come together to form a triangle shape. The size of the triangle is then determined by the width of the border. There's a great article on CSS Tricks if you want to dig deeper!
Since we need 3 triangle to make our star, we can use a single div and the before and after pseudo elements. This answer on StackOverflow beautifully breaks down how the overlapping triangles give us our star shape. Here's a gif from that answer demonstrating how it all comes together:
The actual values of the border widthes and positioning are arbitrary and completely up to you for how big you want the star and where inside of the moon you want them to be. Whatever sizes you pick, the "bottom" two triangles (in this case, the parent and after elements) need to be the same size. Just make sure your moon div has a position value other than the default static so that the stars will be placed relative to the moon.
Toggle the icons
const sun = document.querySelector(".sun")const moon = document.querySelector(".moon")const button = document.querySelector(".container")button.addEventListener("click", () => {sun.classList.toggle("visible")moon.classList.toggle("visible")})
Our JavaScript is very simple! We can grab our button element and add a click event to it. When the button is clicked, we want to toggle a visible class on our sun and moon divs. And that's it! In our styling for the visible classes for the sun and moon, we can simply toggle the opacity value between 1 to 0. Adding a transition helps the change be smoother instead of a sudden, jarring change.
Adding animations
Now that we have a working toggle, let's add some animations for some added flair. Here's what the final product looks like:
Let's start with the sun. Since we are starting with the sun icon being visible first, we're going to set an opacity of 0 on our .sun element. Then, when the sun is visible, we can change that opacity to 1. To make the sun shrink as it's transitioning to the moon icon, we can have the sun start with a transform: scale(0.6) so that it's a little bit smaller than the height and width we gave it. When the sun is visible, we can transform it back up to a scale(1) to that the sun is its normal size. Finally, we can add a little spin by rotating the sun. To make all of these changes smooth as the visible class gets toggled, we can add a transition value.
.sun {/* other sun styles excluded for brevity */opacity: 0;transform: scale(0.6) rotate(0deg);transition: transform 0.3s ease-in, opacity 0.2s ease-in 0.1s;}.sun.visible {opacity: 1;transform: scale(1) rotate(180deg);transition: transform 0.3s ease-in, opacity 0.2s ease-in 0.1s;}
For the moon, we're going to do the same thing: toggle the opacity and do some scaling and rotating!
.moon {/* other moon styles excluded for brevity */opacity: 0;transform: scale(0.3) rotate(65deg);transition: transform 0.3s ease-in, opacity 0.2s ease-in 0.1s;}.moon.visible {pointer-events: auto;opacity: 1;transform: scale(1) rotate(0deg);transition: transform 0.3s ease-in, opacity 0.2s ease-in 0.1s;}
Finally, for the stars we'll toggle the opacity and rotating. Since they're so small, I didn't bother messing with the scaling. However, I DID want to make one of the stars smaller than the other, so our star div with the small class does have a scale to make it smaller than the other star element. I also opted to give the stars an opacity that's less than 1 to give a bit of an illusion of depth.
.star {/* other star styles excluded for brevity */transform: scale(0.55) rotate(35deg);opacity: 0;transition: all 0.2s ease-in 0.4s;}.star.small {/* other small star styles excluded for brevity */transform: scale(0.35) rotate(35deg);opacity: 0;transition: all 0.2s ease-in 0.45s;}/* we only want the stars visible when the moon is also visible */.moon.visible .star {opacity: 0.8;}.moon.visible .star.small {opacity: 0.7;transform: scale(0.45) rotate(35deg);}
As always, feel free to change anything to fit your tastes and needs! I had a lot of fun making this toggle and I hope you will, too! 😊